
Roblox is an online game platform that millions of people play on, but only a few people use its game making engine: Roblox studio. Now, I wouldn’t call myself an expert on Roblox studio, but I have been using it on and off over the past few years.
In this article, I’ll go over some useful information for builders new to the engine. Things like the basics, building tips, and useful exterior sources to have a look at. So here are a few things I learnt over the years. Hope you find them useful.
If you boot up Roblox studio and enter the “Baseplate” template, you should see something like this:
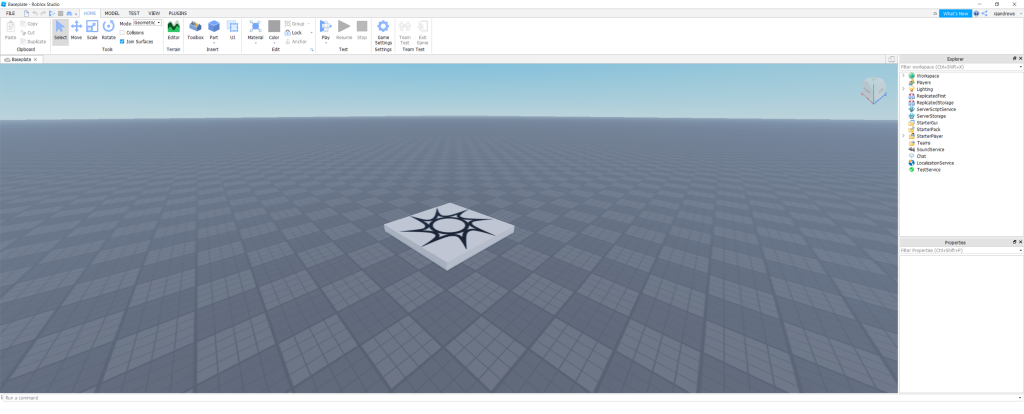
(Your things may be in different locations, I moved mine around)
To some people, this may seem a bit overwhelming, but I’ll try and simplify it for you. First, look at the two bars on the right.
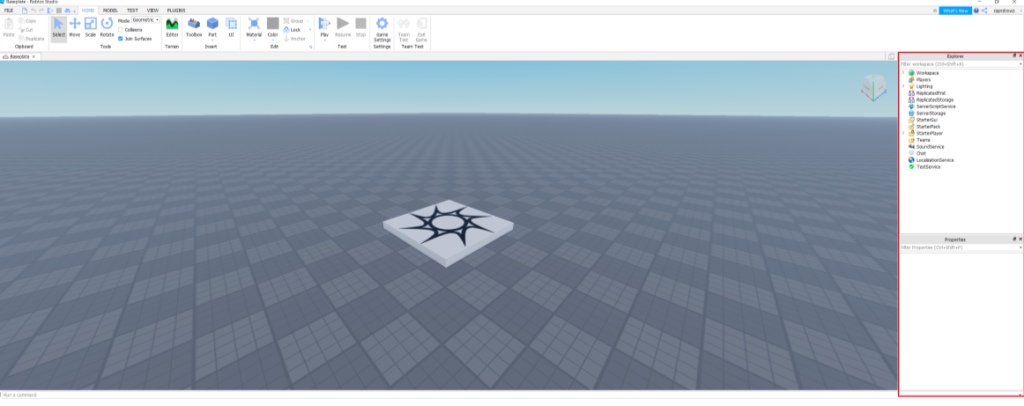
These are the “Explorer” and “Properties” tabs, and are quite important. The Explorer tab allows you to interact and modify everything you put into the game. For example, it allows you to modify scripts, lights, and objects. And the Properties tab allows you to change individual things about something, like it’s size, colour, or texture. Next, let’s look at the bar on the top.
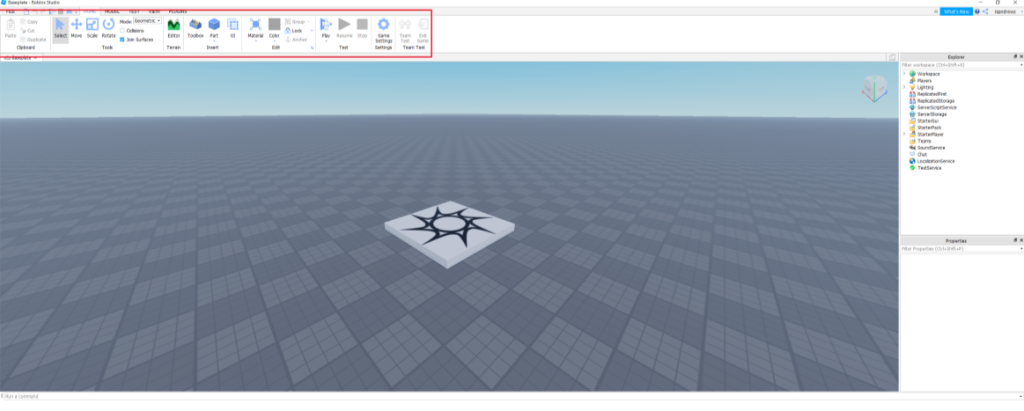
Most of these should be self-explanatory, the move button to move, scale to scale, etc.
However, there is an important button called the “part” button, it allows you to place various shapes into your game. These are simple polygons (cubes, cylinders…). The “material” and the “colour” buttons allow you to more easily change certain aspects of things without having to go into the “properties” tab.
That should be enough. You should learn the rest by simply building and experimenting in Roblox Studio.
Now, to actually do some building.
First, go to the “Model” tab by pressing “Model” on the top bar.
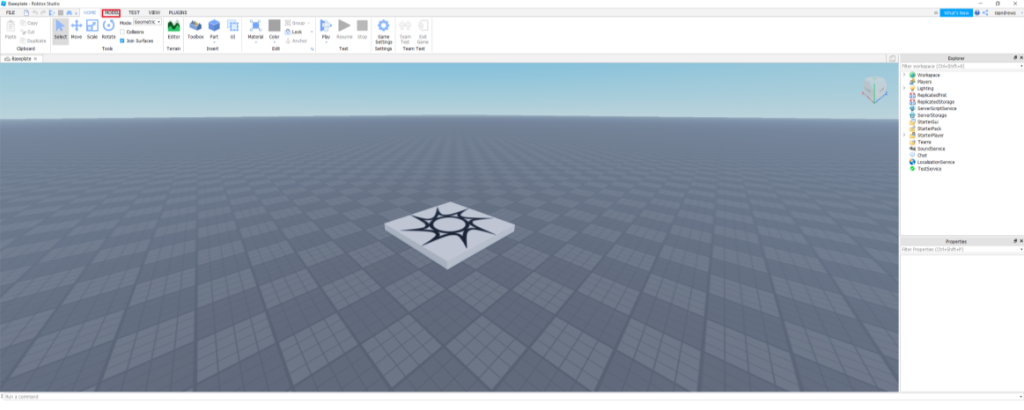
There should now be a similar bar on top, with different buttons.
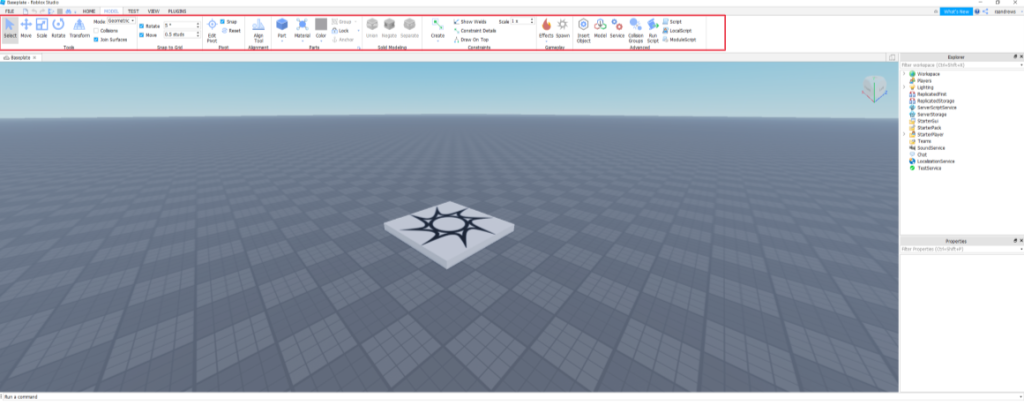
If this is your first time using Roblox studio, or you haven’t used this bar before, there are a couple things I recommend you do. Firstly, turn off collisions (click the box shown below if it’s lit up in blue; if it’s already white, collisions are already off)
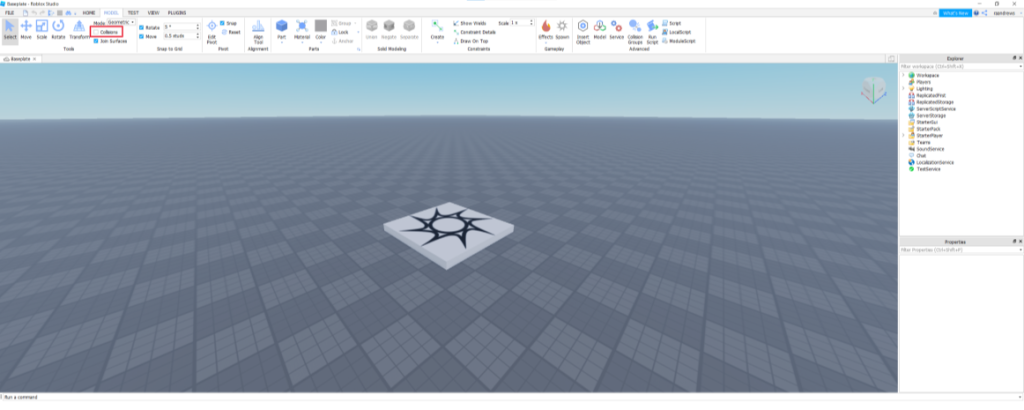
This allows you to more easily build and move parts around without them getting stuck on things. It can also allow for more complex builds, with objects partially inside each other. Second is this “Snap to grid” section.
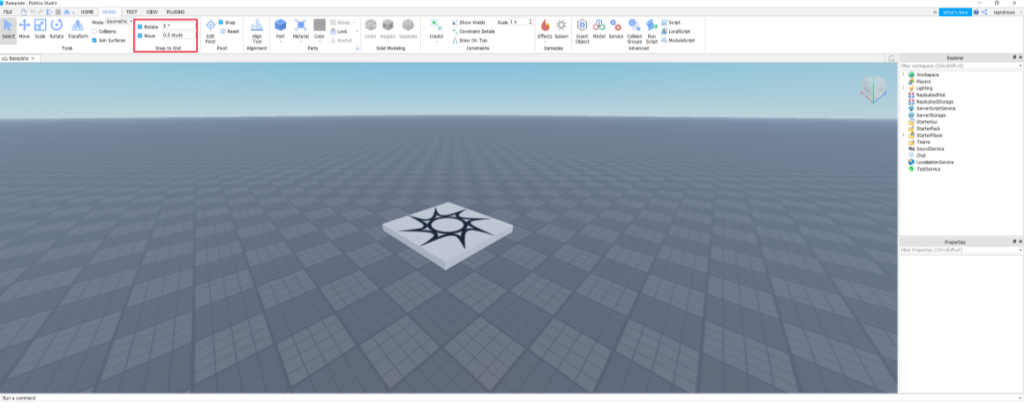
This allows you to adjust how many studs (the measuring system used in roblox studio) and degrees each movement does. Or more simply, the lower they are, the more freedom you have in your movements.
I wouldn’t go too low though, it can make lining things up exactly very difficult.
I recommend to stick at 0.5 studs for basic building, and drop it to 0.1 studs for more complex buildings. If you need to, you can make it a little higher if you don’t think you can work with that.
I suggest to only go lower once you’re used to the engine, or you want to try something out. For a comparison, here is a cabin I quickly made just using the one stud integer.
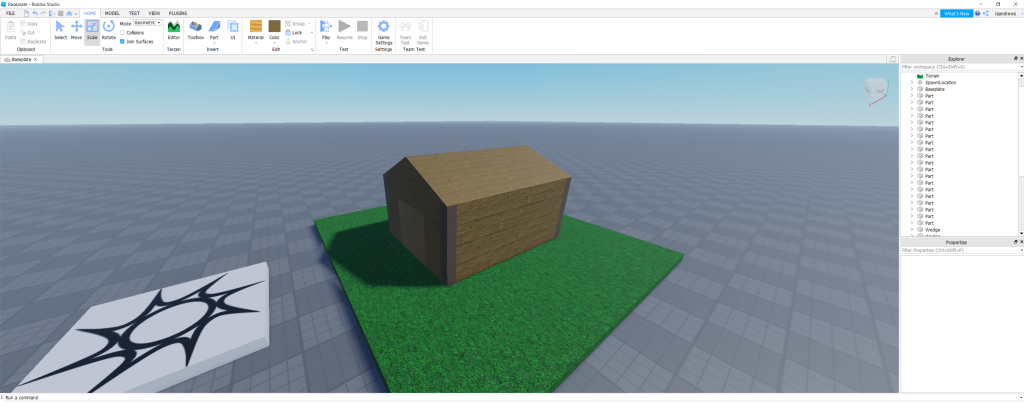
And this is the same cabin, after adding and adjusting some things with a lower scale (I just used a 0.1 stud Integer)
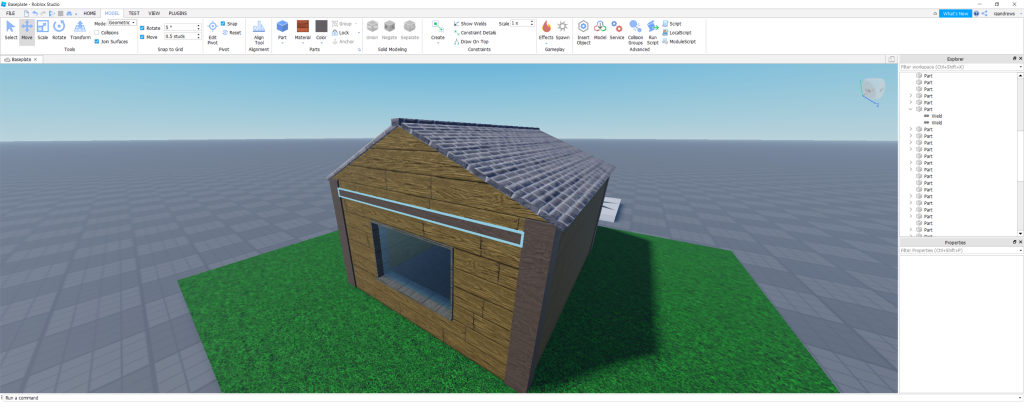
(Don’t mind the glowing beam, my cursor was on it)
This can show how much effect it can have. And is a very useful skill for builders (or anyone, really) coming to the platform to use and perfect. The final thing I’ll go over are unions. Unions are used for a variety of features, but the main use is connecting different parts together. This is quite useful, as you can make much more complex shapes from simpler ones. For example, here’s a hill.
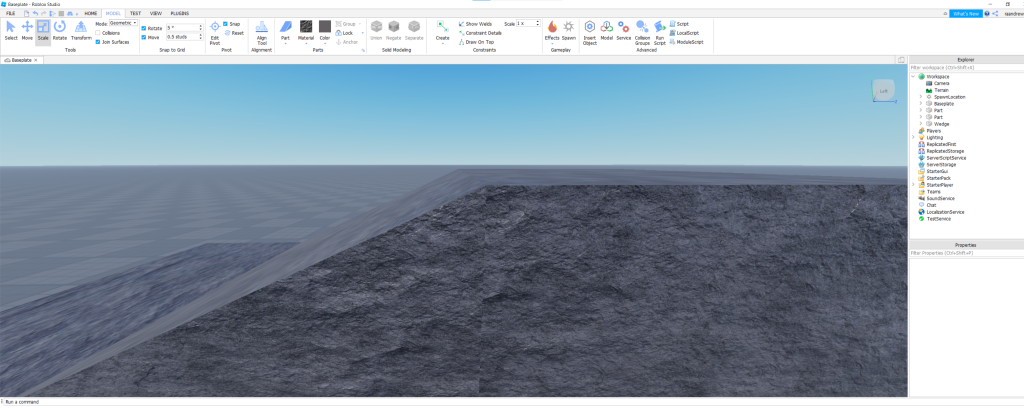
Notice how the material doesn’t fit together. This is because they are separate parts, which can make things look weird. Using the union tool allows you to correct this (little sidenote, using the union may cause some slight side effects with certain Shapes and materials). Making a union is easy, just drag a box over all the shapes (or hold shift and left click each one individually) Here is the same hill as above, but I’ve put all the parts in a union together (I’ve also highlighted where the union button is. Take note of the buttons next to it, I’ll talk about them shortly).
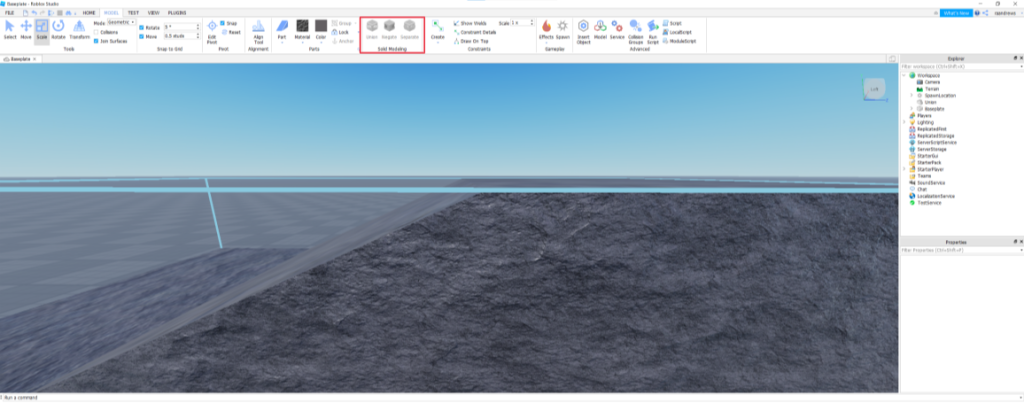
See the difference? While this was a small example, on much bigger worlds and maps, this is very useful.
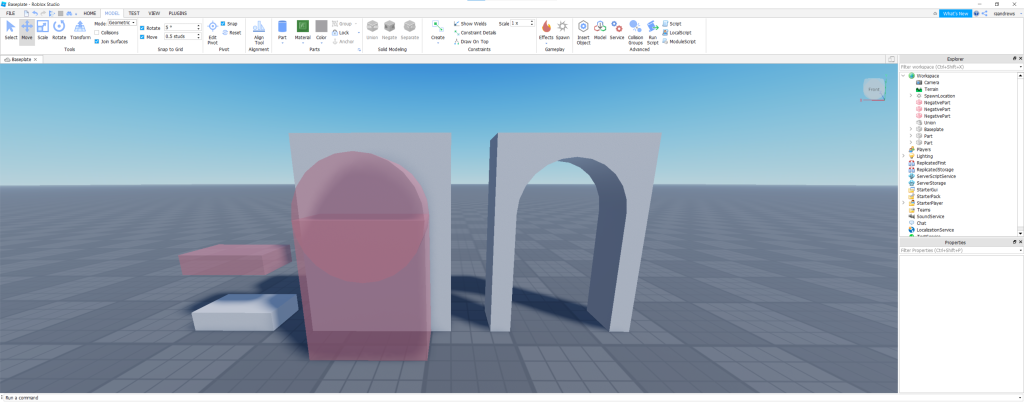
You can also negate parts to subtract the negated from the other when put in a union together. These can be used to create various holes, archways, and more complex shapes.
Now that you know the basics, here are some more in depth resources to go to if you want to have a more detailed read.
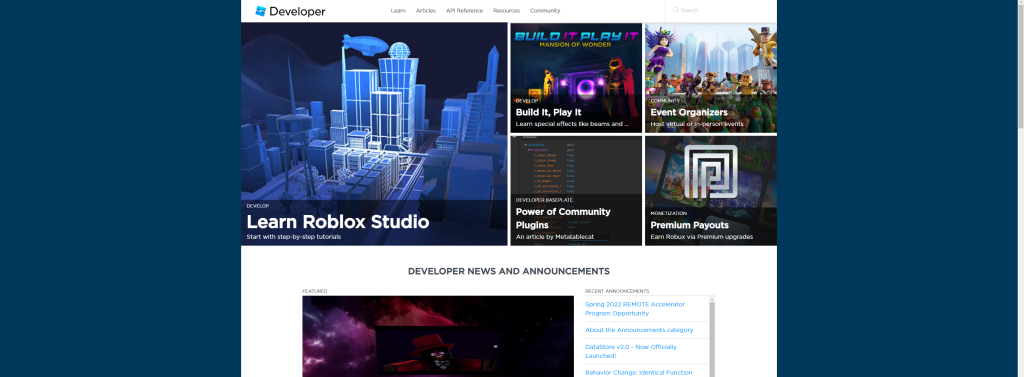
On it is a large amount of developer resources that will assist most developers, especially those new to the platform. It has articles, guides, news, and various other pieces of information to assist developers. And for those newer developers, it has got a whole section on learning Roblox Studio. With a lot more information than I can put into this article (Plus it was written by the actual people who made the engine, so they know quite a bit more than I do) So I highly recommend at least checking this out when you got the chance. You can access it through the create page on your browse, than clicking this small box:
Another good source is YouTube. People there are always sharing various tips and tricks and how to videos. Some of them are also done by Roblox, who’s also got it’s own YouTube channel, so you should check that out too. I’m sure there are others, but those are the main one’s I’ve used, but I’m sure there are other articles like this one showing them, so feel free to do some exploring.
That should be all, hope you found some use out of these little tips and tricks. And if you didn’t, then you should find them on the exterior sources I suggested. And with that, good luck and goodbye.
